Mason Jar Spout Tip
We store maple syrup and other liquids in mason jars. I love storing in glass, liquids especially. I do have some Tupperware containers that I can’t part with yet for nostalgic reasons more than anything but those store dry items and they are really handy so not ready to transition away from them just yet.
When storing in and pouring from mason jars, they often, if not always, drip. This is a messy and annoying thing especially with maple syrup! This spout tip will alleviate all those drips and will make your life easier! Believe me! It’s an awesome tip! You will thank me!
As always, when you use this tip and make your spouts, please post a photo of your Mason Jar Spout and tag my IG account #RenataCollective or leave a comment with your thoughts!
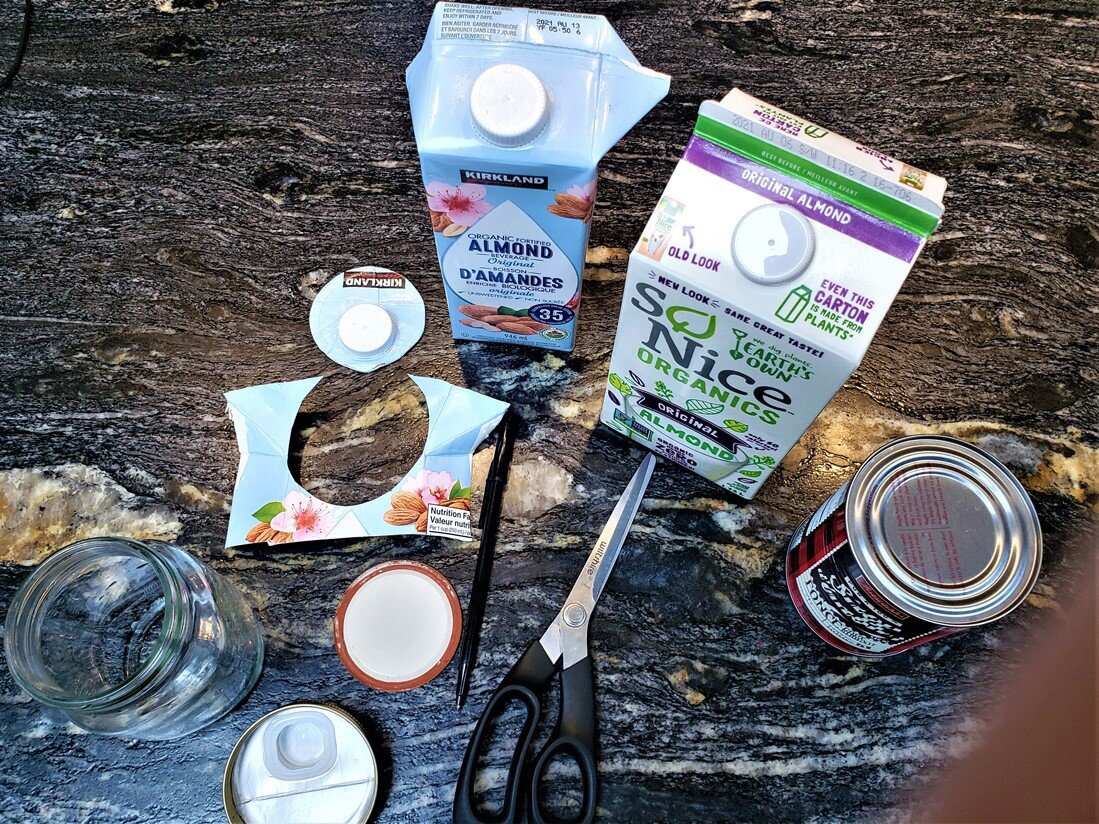
What You will Need
Mason jar
Mason Jar 2 Piece Metal Lid (ring and insert)
A Carton with a Plastic Spout – i.e.: from almond milk (which is what I use)
A Pencil or Pen
Scissors
Step 1
Pry open the milk carton container to have the top be a flattened spout area. Cut a wide area around the spout area.
Step 2
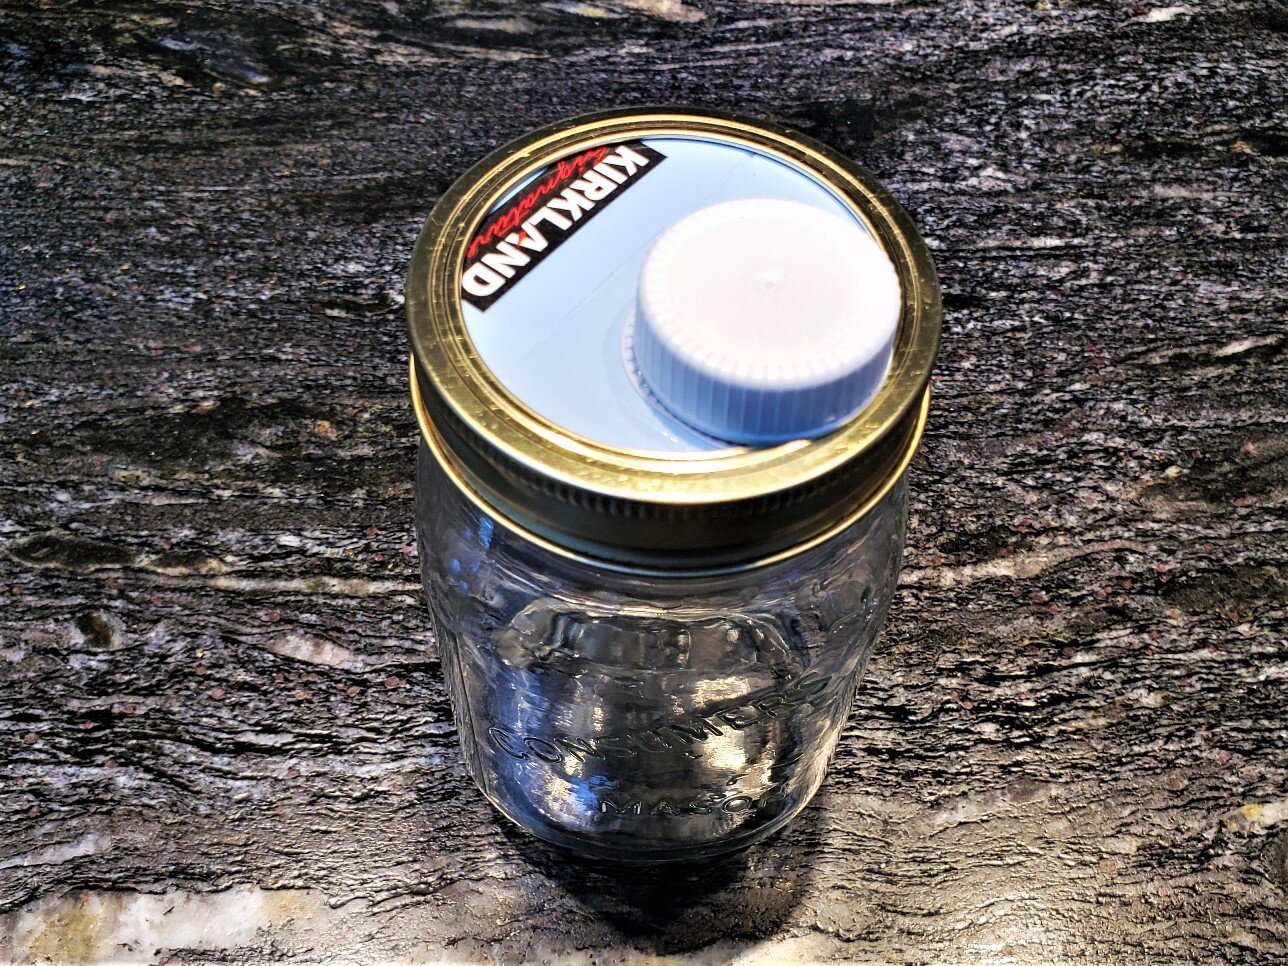
Place the round metal insert on the back side of the flattened spout, with the spout area towards the side. You want the spout towards one side of the ring for pouring. See the photo or video.
Trace around the metal insert with the pencil or pen to make the template outline.
Step 3
Cut out along the template outline.
Step 4
Push the now cut round spout piece into the metal ring. Ensure it is in firmly.
Step 5
Test your new spout by filling the jar with some water, securely screwing the metal ring with the spout insert on the jar and pouring the water out. There should be no leaks from the template insert and no drips from the spout. Use the cap that came with the spout to close the spout.
Step 6
Fill your new spout lidded mason jar with what you wish to fill it with and secure the new spout lid!
Pour away with no drips!
You’re welcome!


